Elestrals Awakened

General / 26 September 2025

I wanted to share a project I’ve been contributing to as a 3D Artist: Elestrals Awakened.


It’s a pixel-art, 2.5D RPG built around Greek mythology. For me, it’s been about translating that mythology into a visual style that feels both nostalgic and fresh, bridging old-school RPG charm with modern art workflows.


We’ve launched the Kickstarter pre-launch page, which you can find here:👉 Elestrals Awakened Kickstarter Pre-Launch: https://www.kickstarter.com/projects/elestrals/elestrals-awakened/


I’ll be posting more behind-the-scenes looks at my process and contributions as development continues.


#PixelArt #GameDev #3DArt

🎮 Exploring Unity with the 3D Game Kit – A Tutorial Series for Artists

General / 15 May 2025

I recently wrapped up two YouTube tutorial series focused on Unity, and I wanted to share a bit of what inspired them here on ArtStation.

As a 3D artist, I’ve always enjoyed experimenting with new tools—and Unity’s 3D Game Kit really surprised me with how accessible and artist-friendly it is. It requires no coding, which makes it a great sandbox for creatives looking to dip their toes into game development without getting overwhelmed by technical barriers.

That experience led me to create two beginner-focused tutorial playlists:

🔗 Learn Unity with 3D Game Kit

📺 Watch the Playlis thttps://www.youtube.com/playlist?list=PLYawJ7qe2YxqncQsSSPtO9DPCvb1adhOT

This first series is all about getting familiar with Unity’s interface and understanding how the 3D Game Kit works. Each video is a bite-sized walkthrough of different tools and features—ideal for artists who’ve never opened Unity before. The goal is to help you build a playable level while gaining confidence in the engine.

🔗 Learn Unity with 3D Game Kit: Game Asset Creation

📺 Watch the Playlist https://www.youtube.com/playlist?list=PLYawJ7qe2Yxr5cViBzjurVnRrUABelpcI

After finishing the intro series, I wanted to take it a step further and explore the art pipeline side of Unity. This companion series walks through creating a simple asset from scratch—modeling in Maya, texturing in Substance Painter, and importing into Unity to give it functionality using the Game Kit. It also covers terrain, particles, lighting, and more.

Both of these series were a lot of fun to put together, and I hope they serve as a solid starting point for other artists looking to bring their work into a real-time engine like Unity. If you’ve ever thought, “I want to make a game, but I’m not a programmer,” these playlists are for you.

Thanks for checking them out, and feel free to reach out if you have feedback or suggestions for future tutorials!

– Andre (Vertmode)

Announcing My New Course - Mastering Human Anatomy for 3D Artists

Tutorial / 22 May 2024

Hey everyone,

I am thrilled to share some exciting news with you all! After months of hard work and dedication, I’m proud to announce the launch of my new course on Udemy: Mastering Human Anatomy for 3D Artists.

As a 3D artist, I've always been fascinated by the intricate details of human anatomy and its crucial role in creating realistic and compelling characters. This course is designed to take you on an immersive journey into the world of human anatomy, focusing on the Ecorche approach. For those unfamiliar, an écorché is a detailed depiction of the human body without skin, highlighting the muscles and skeletal structures beneath. This technique has been used by master artists throughout history to elevate their understanding and portrayal of the human form.

What You’ll Learn

In this course, you will:

  • Block Out the Human Form: Start with polygon modeling techniques in Maya.
  • Detailed Ecorche Drawing: Conduct a thorough study of human anatomy through ecorche drawings.
  • 3D Ecorche Study: Translate your 2D drawings into detailed 3D models using ZBrush.
  • Advanced Techniques: Learn about different types of topology, retopology for animation, UV layout, and generating normal and displacement maps.

Why Take This Course?

  • Learn from an Expert: Gain insights from my years of experience as a 3D artist and industry professional.
  • Blend Tradition with Innovation: Combine classical art techniques with modern tools like Maya and ZBrush.
  • Enhance Your Skills: Whether you're a beginner or an experienced artist, this course will deepen your understanding of anatomy and improve your 3D modeling skills.

Special Launch Offer

To celebrate the launch, I’m offering a special discount! Use the code ANATOMY101 for a limited-time offer. Don’t miss this opportunity to elevate your artistry and gain a deeper understanding of human anatomy.

Click Here to Enroll!

Join Me on This Journey

Creating this course has been a labor of love, and I’m incredibly excited to share it with you. I hope it inspires and equips you to create more realistic and compelling characters in your own work. Let’s embark on this artistic journey together and unlock the secrets of human anatomy.


Feel free to reach out if you have any questions or need guidance. I’m here to help!


Best regards,

Andre Wahl

Founder of Vertmode


Thank you for your support, and I look forward to seeing the incredible art you create!


Udemy Course Launch – Complete 3D Animation Master Class: Create Animated Shorts

Tutorial / 07 August 2023

I am thrilled to announce the launch of my new Udemy course, Complete 3D Animation Master Class: Create Animated Shorts!


After resigning from my teaching position, I embarked on an ambitious journey to create a course that takes students from complete beginners to intermediate and advanced 3D artists. My goal was to provide a comprehensive learning experience that covers all the essentials of the 3D pipeline, equipping students with the skills they need to create their own animated shorts and even post them on popular video hosting sites like YouTube and ArtStation.


One major complaint I often heard from students over the years was the difficulty of envisioning the entire 3D pipeline when the subjects were covered piecemeal, often months apart, and in an incomprehensible order. To address this issue, I designed the course as an iterative series of projects, taking students through the entire pipeline with each project covering core principles of modeling, texturing, rigging, animating, rendering, and compositing in a cohesive manner.


In the first project, I guide students in creating a forest environment using primitive geometry and basic materials. This section introduces fundamental concepts of navigation, movement tools, materials, and rendering.


The second project delves into textures and the legacy workflow, where we create a specular texture set for a sphere. This sets the stage for understanding rigging concepts like pivots, hierarchies, and custom attributes. We then transition smoothly into animation, touching on the 12 principles of animation and getting hands-on with keyframes. Additionally, we explore batch rendering and take our first steps into Adobe After Effects, sourcing and importing sound to enhance our animation, and finally using Adobe Media Encoder to produce our first movie ready to share with the world!

(enable audio)

In the third project, we level up our skills by animating a simple robot. This robot is assembled from geometric primitives, and we explore how to use UV layouts to create a texture atlas. In this section, students are introduced to Arnold, PBR materials, and creating textures for the metalness workflow. We proceed to rig the robot, establishing a basic geometric hierarchy and control system using parents and constraints. We then dive into hierarchy-based animation and take an advanced look at rendering and compositing, setting up AOVs and using basic compositing techniques to achieve a beautiful final result. As a bonus, we explore recording our own sound effects (foley) and perform some basic audio manipulation to create a completely custom video.

(enable audio)

For the fourth and final project, students model a sci-fi set and a simple organic egg character, animating it hatching. This section provides an industry-standard exploration of every aspect of the pipeline, including modeling tools, UV projection and layout tools, joint & skin-based rigging with IK and FK systems, advanced lighting for 3D production, AOV and render layer basics, advanced compositing techniques, and sourcing audio from audio libraries. The result is a professional-looking final project that students can proudly share with the world!

(enable audio)


If this course sounds like something that interests you, I am offering it at a MAJOR discount price in celebration of its launch. Use the Code VERTMODE-LAUNCH at checkout to get 90% off the normal price!


Or you can click the link below to jump straight to checkout!

[Promotional Link: https://www.udemy.com/course/3danimationmasterclass/?couponCode=VERTMODE-LAUNCH]


Join me on this creative journey, and let's bring your animation dreams to life together!


Korok Seed

Work In Progress / 28 October 2021

I am teaching an introductory Zbrush course this week, and needed a subject to demonstrate the dynamesh workflow on. When brainstorming ideas, I came across the Korok and felt it was perfect for the task. I threw in some extra demos on using surface noise and layers as well. I might come back and finish this guy later. Fun little doodle in ZBrush.


Exterior Environment

Making Of / 22 November 2020

Hello all!

I am currently working on an exterior game environment for my Graduate Degree. We are making an exterior vignette, and I have chosen to create a teleportation location that is themed in Viking times. I am constructing a series of magical Rune Stones that allow the player character to tap into Yggdrasil’s power to travel through time and space.   

I have just completed the high poly development of the main assets in ZBrush. Next, I will move to low poly mesh construction, UV, and texturing the assets. Then I need to decide which layout I am going to go with for the presentation, as well as research foliage located in that part of the world and develop the models for that to decorate the scene.

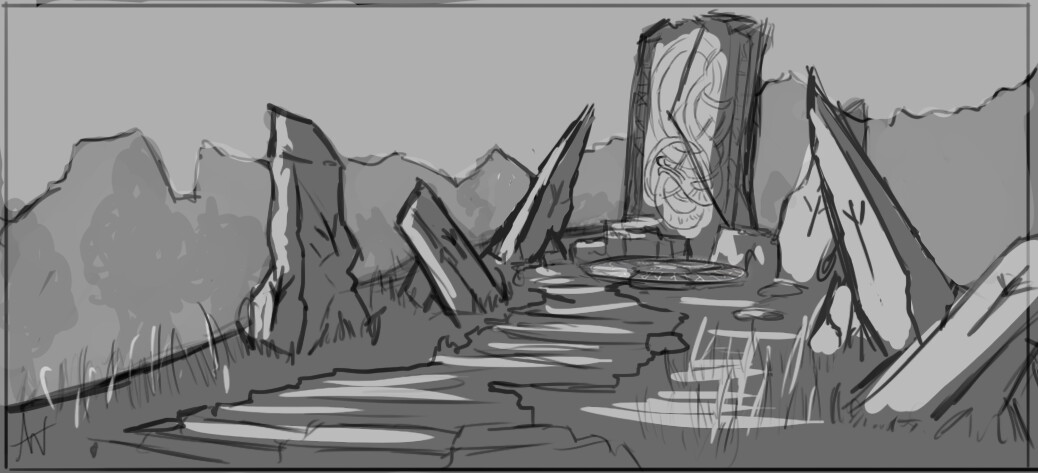
This is my 1st concept for the layout. I am not sure I will be going with this one due to the time constraint I have, but it was great for figuring out what shapes I wanted in my stones.


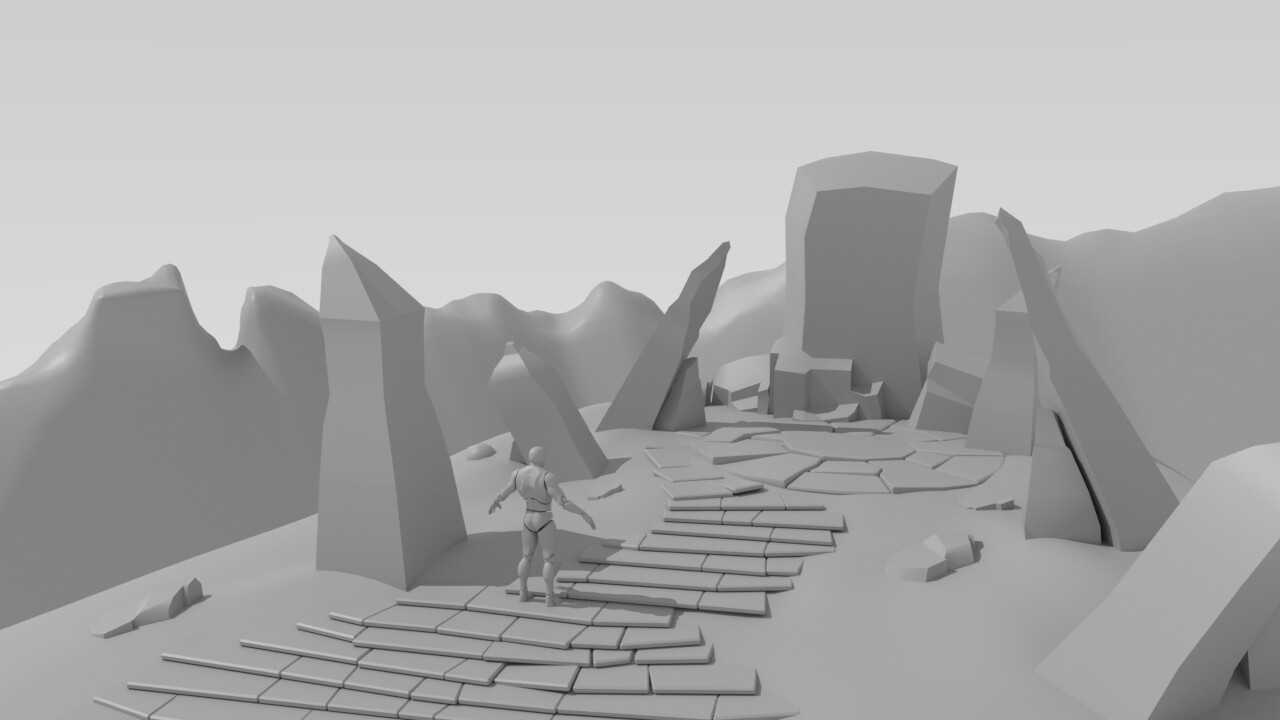
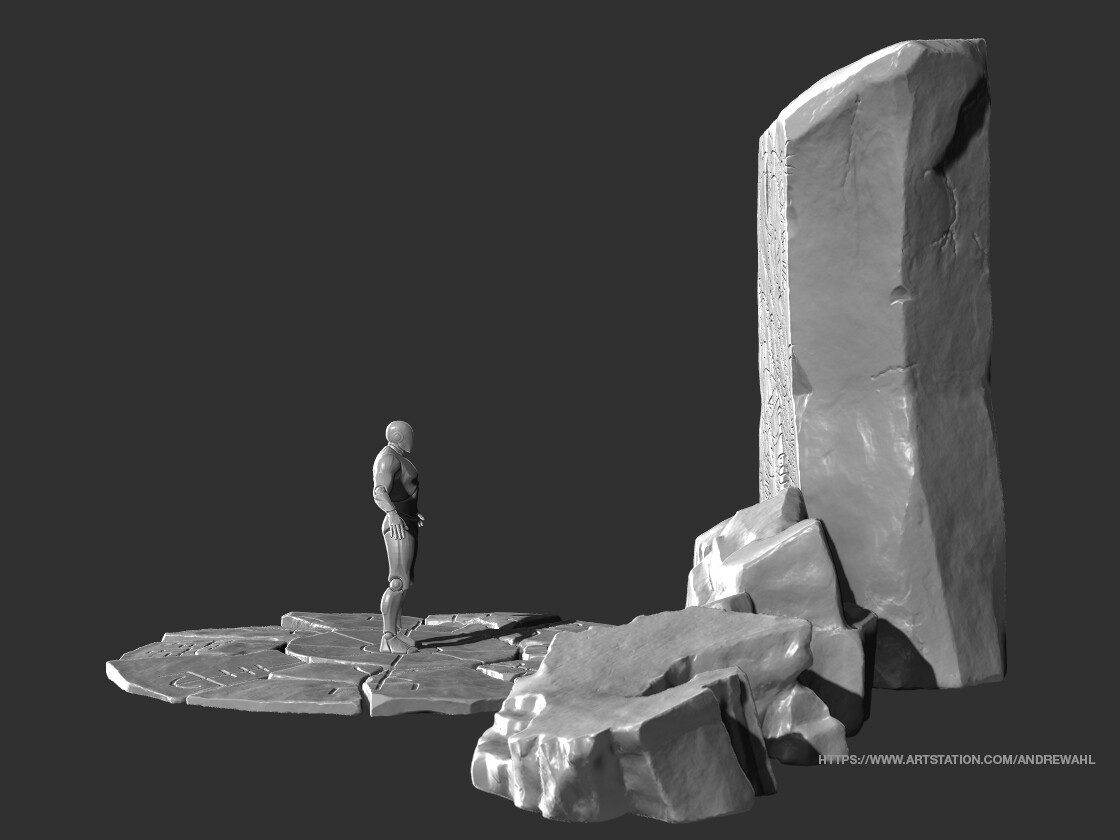
This is my initial blocking pass of the first scene layout in Maya. This allowed me to get a sense of the scale of the stones, and these are the base meshes I brought into ZBrush for development. 

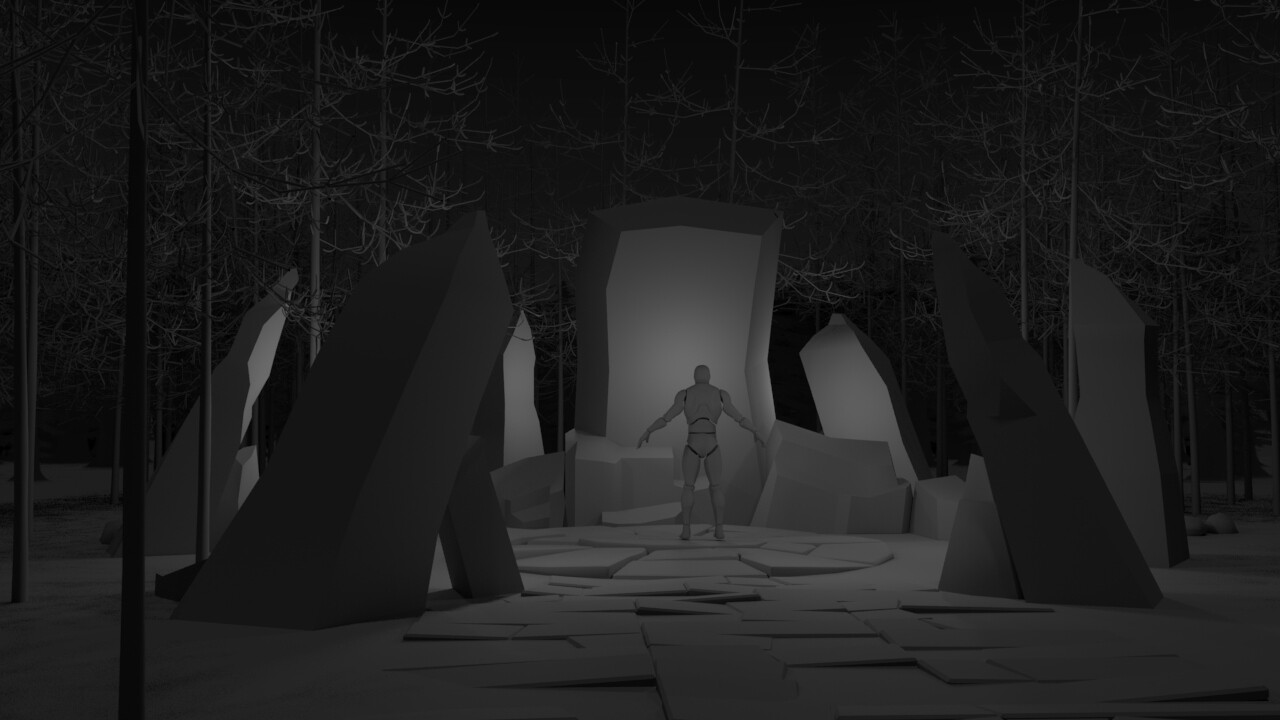
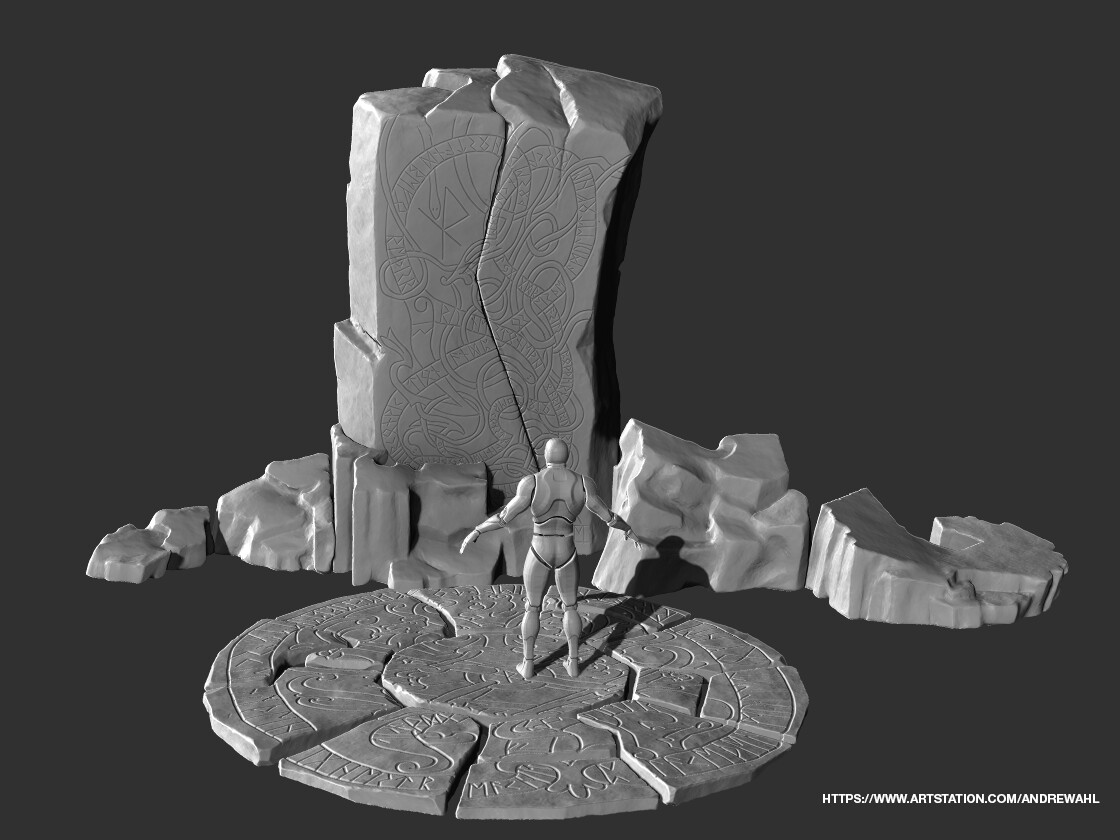
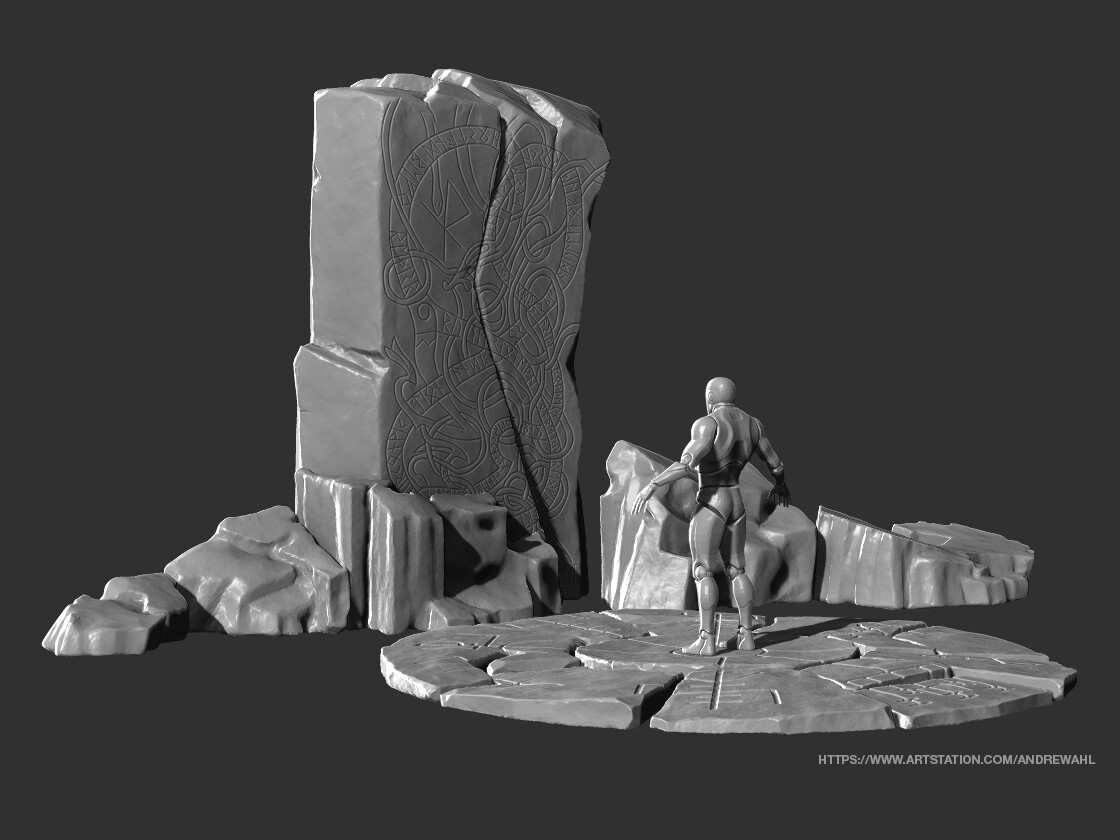
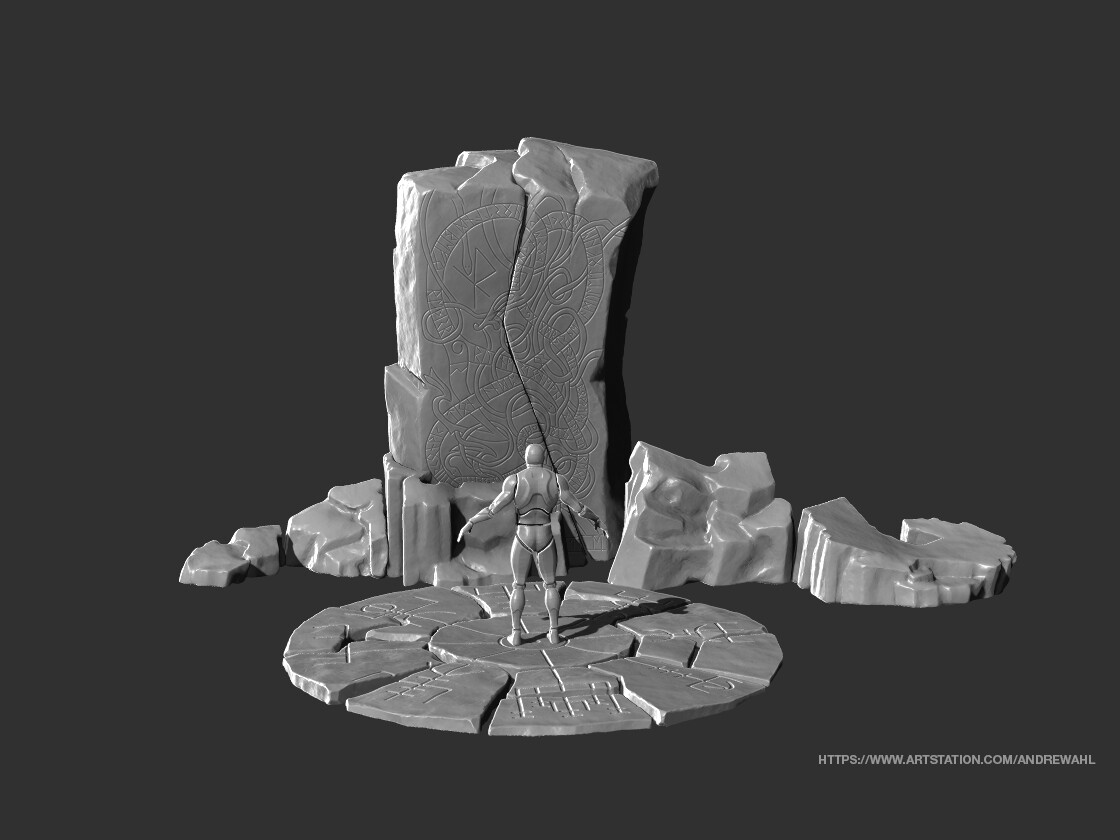
This is the second version of my scene and likely the layout I will use for my final scene. This one was inspired by my original source of inspiration for the project, which is the stones in the Outlander series. 

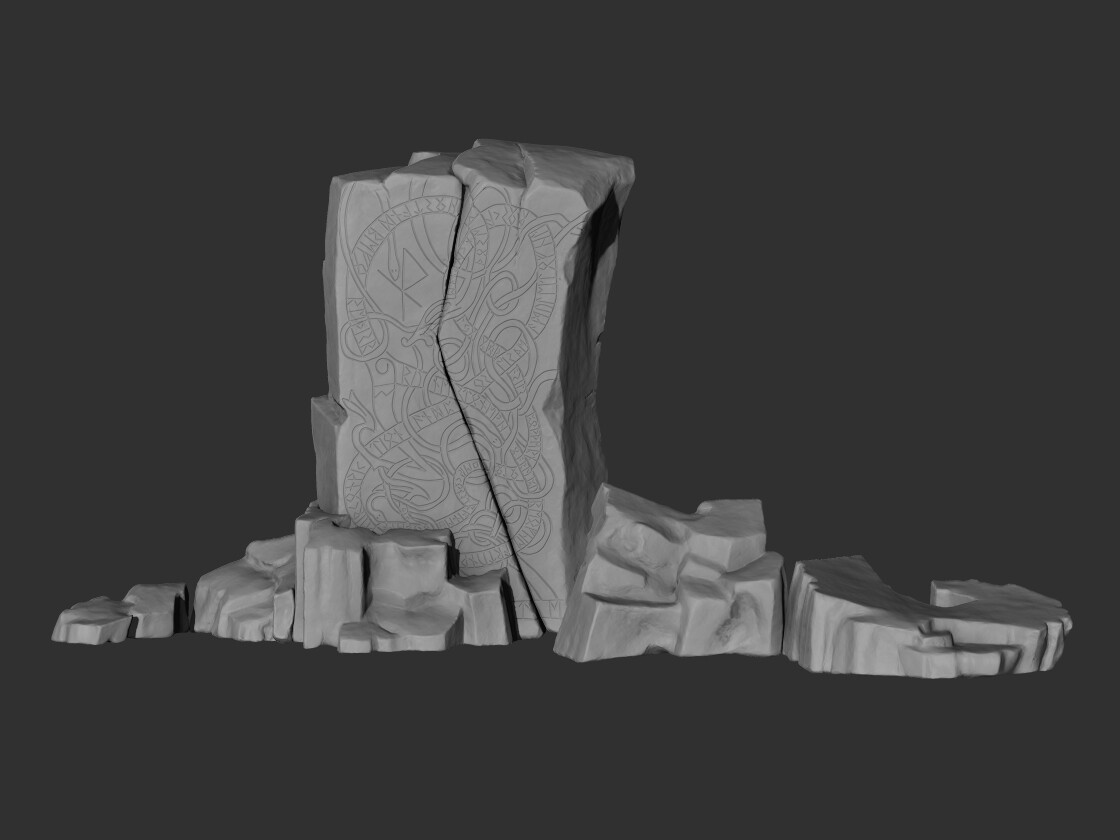
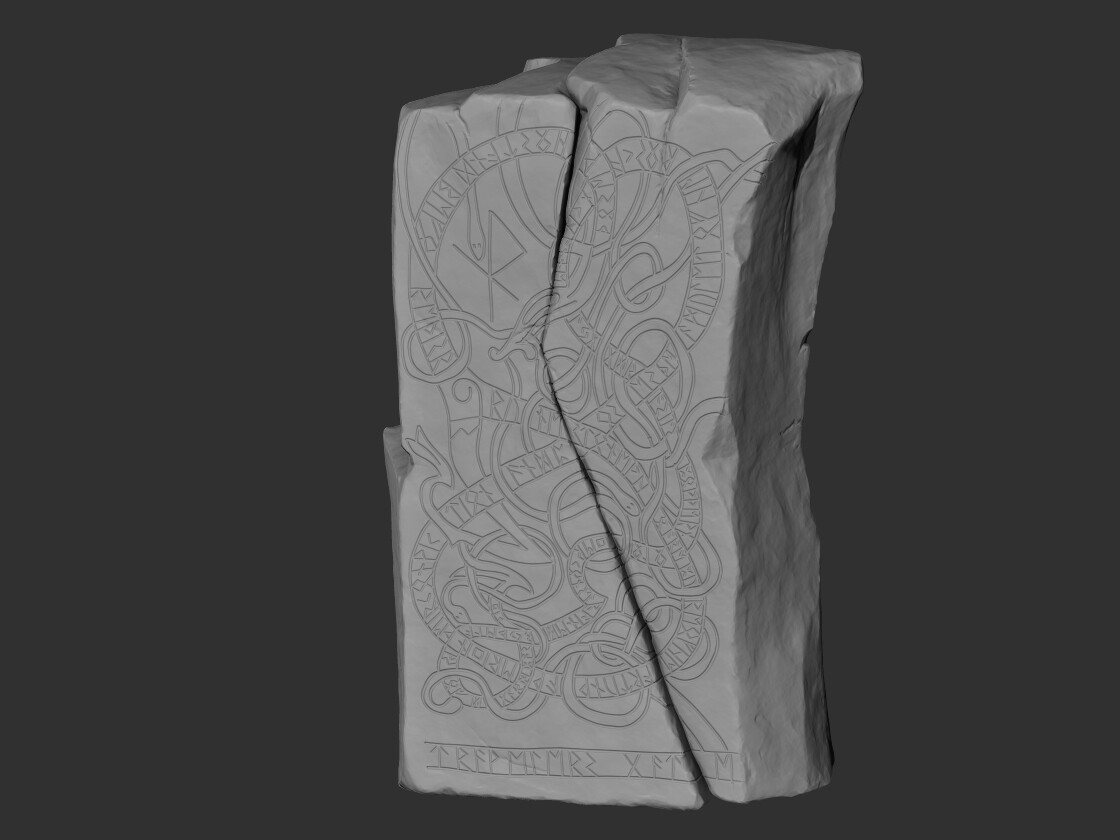
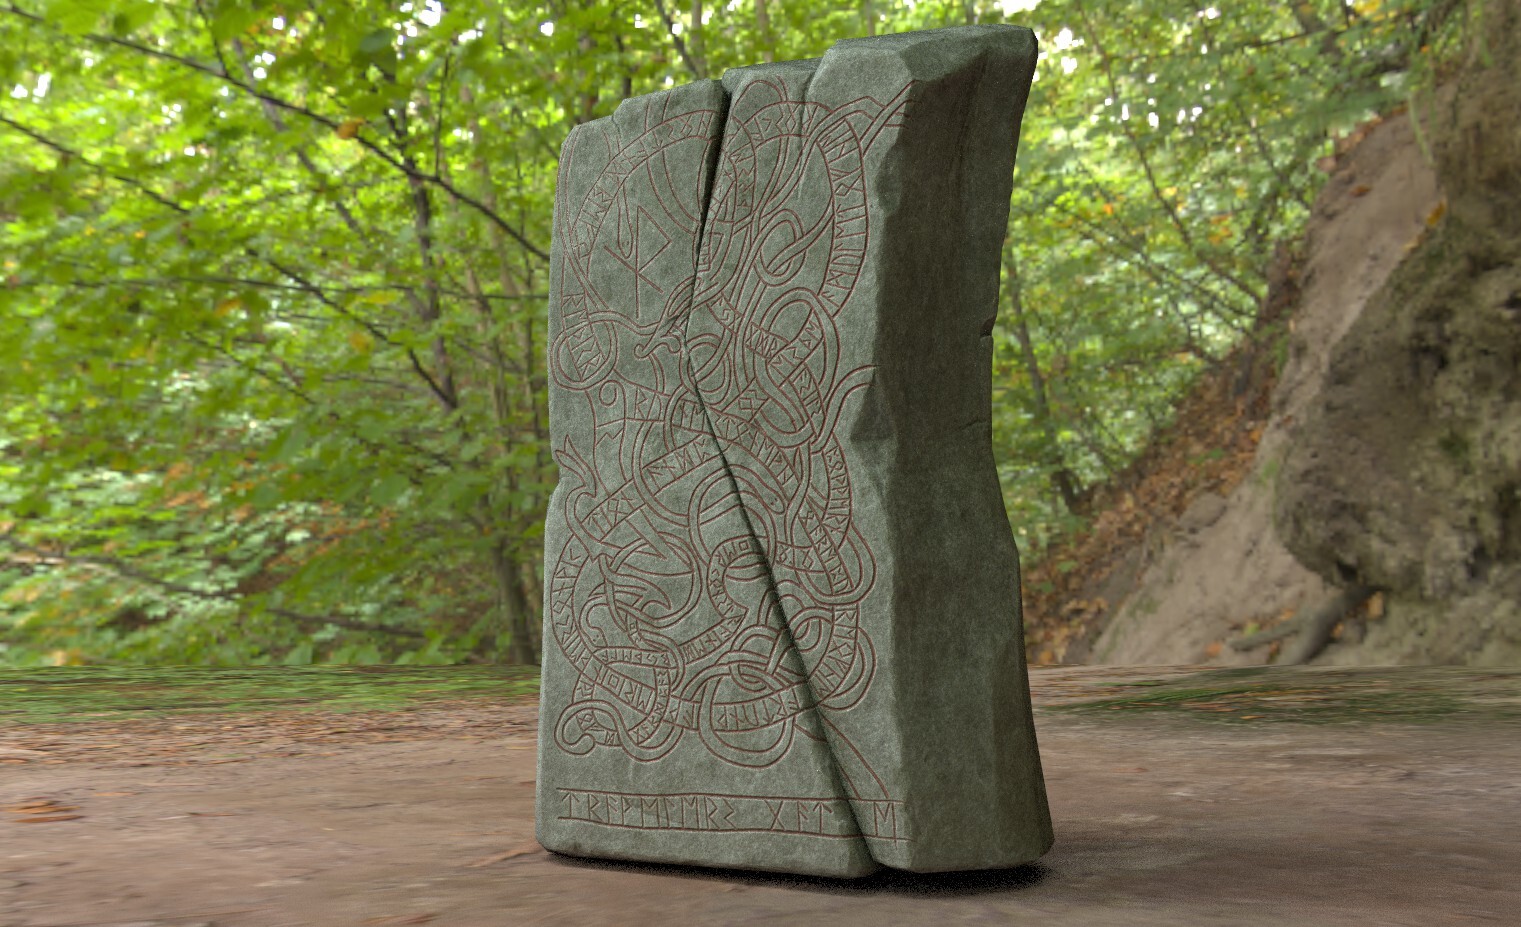
This is the main runestone. The design is inspired from a real Rune Stone. I modified it to remove Christian elements that were present in the design. Runestones designs like these are generally Gravestones, so I inserted my own text using a English to rune converter I found online. I doubt I wrote it in a legible way, but at least I know it is not grave stone textually! 

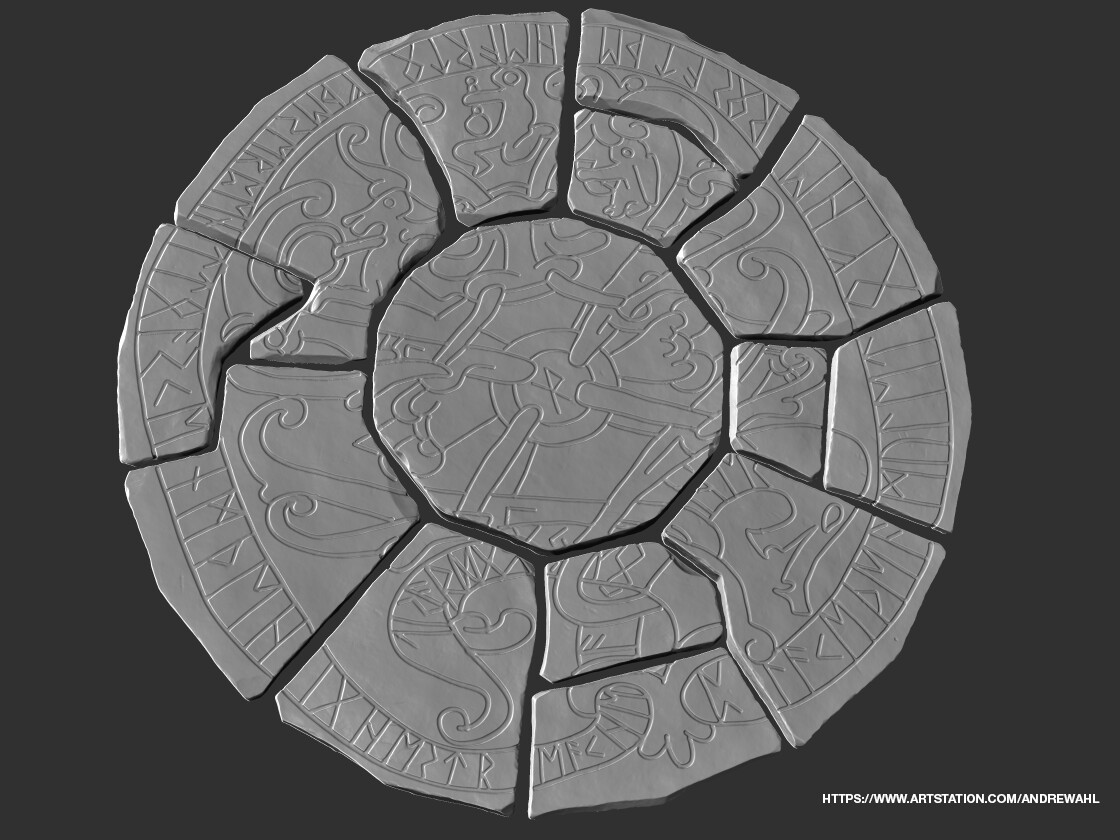
For the base circle I original went with a similar style to the rune on the main stone, but after seeing it together with the main stone I felt the design was too busy and pulled attention way from the main stone. I went with a simpler more meaningful design over this one. This is the original design I opted not to use. 

The ground appears too busy here, and really draws the eye in more than the main stone. 

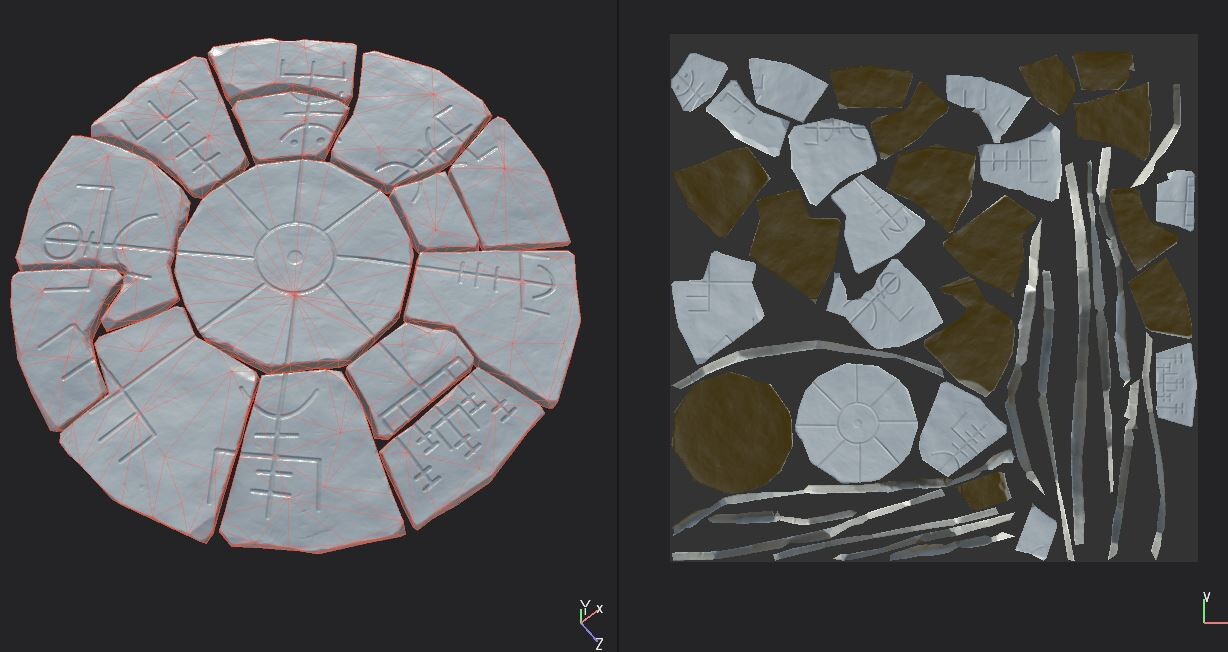
For the new circle I opted to go with a rune  called Vegvisir, which means “That Which Shows the Way”. I felt it was a fitting design since this is designed to be a teleportation location. It is also circular by nature and compositionally guides the eye to the main stone. I added an indentation to the center which is where the player would place the Amulet for Hero's which allows them to control the portal. 

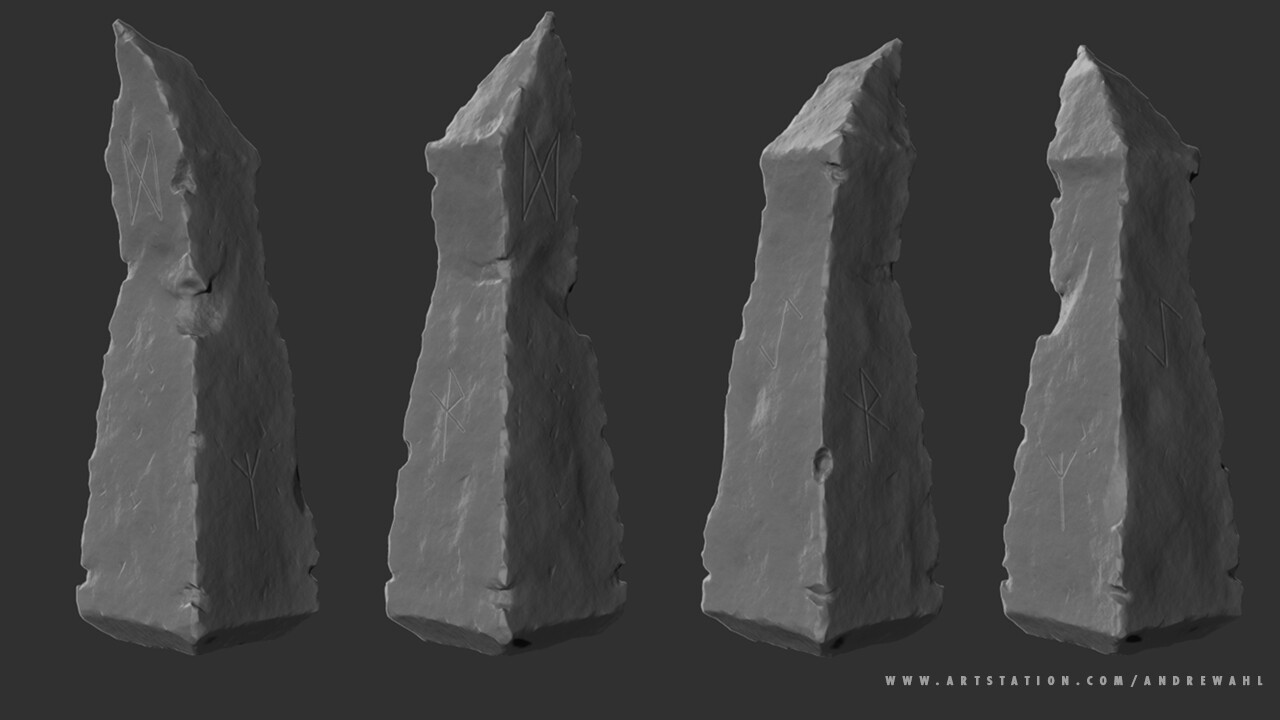
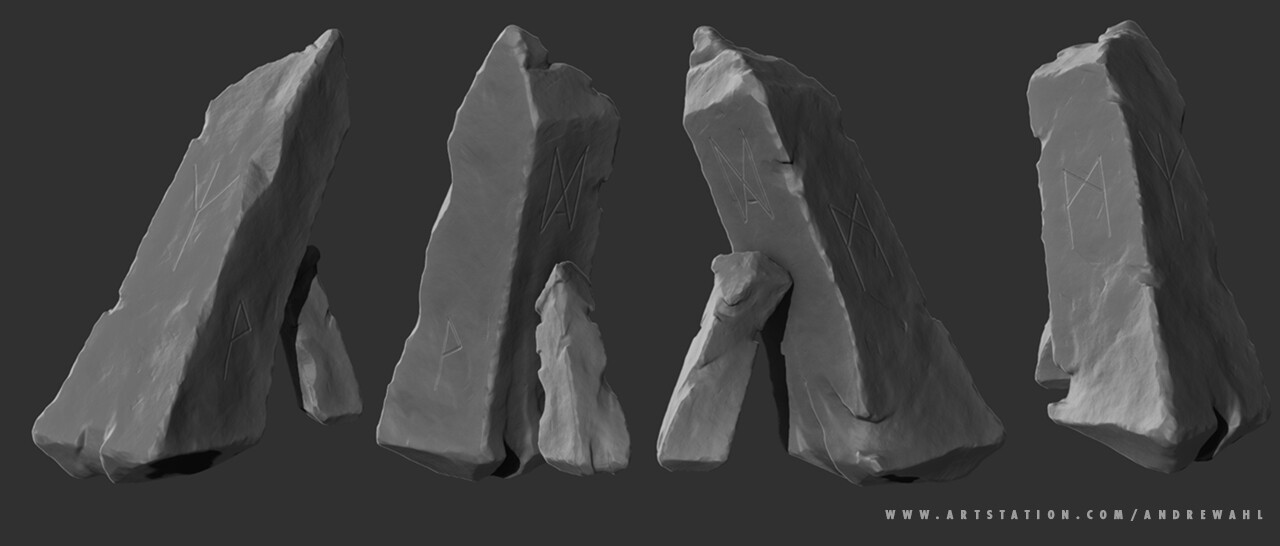
Each of the larger runestones has separate runes each with a meaning connected to the area's purpose. On the ones that are propped up by smaller rocks, I put a rune that means balance, to indicate magic is what is holding them up. 

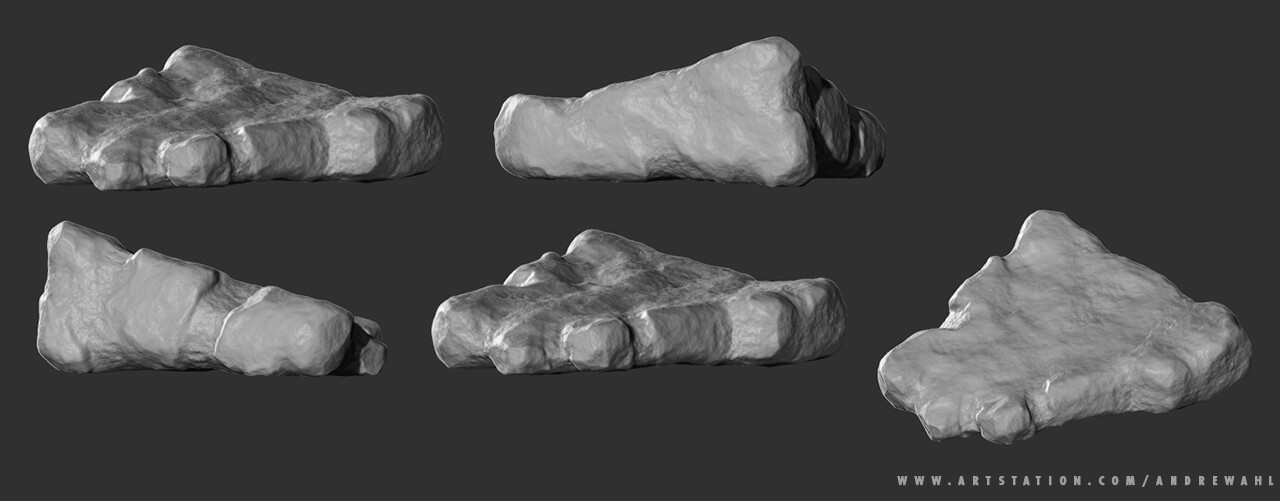
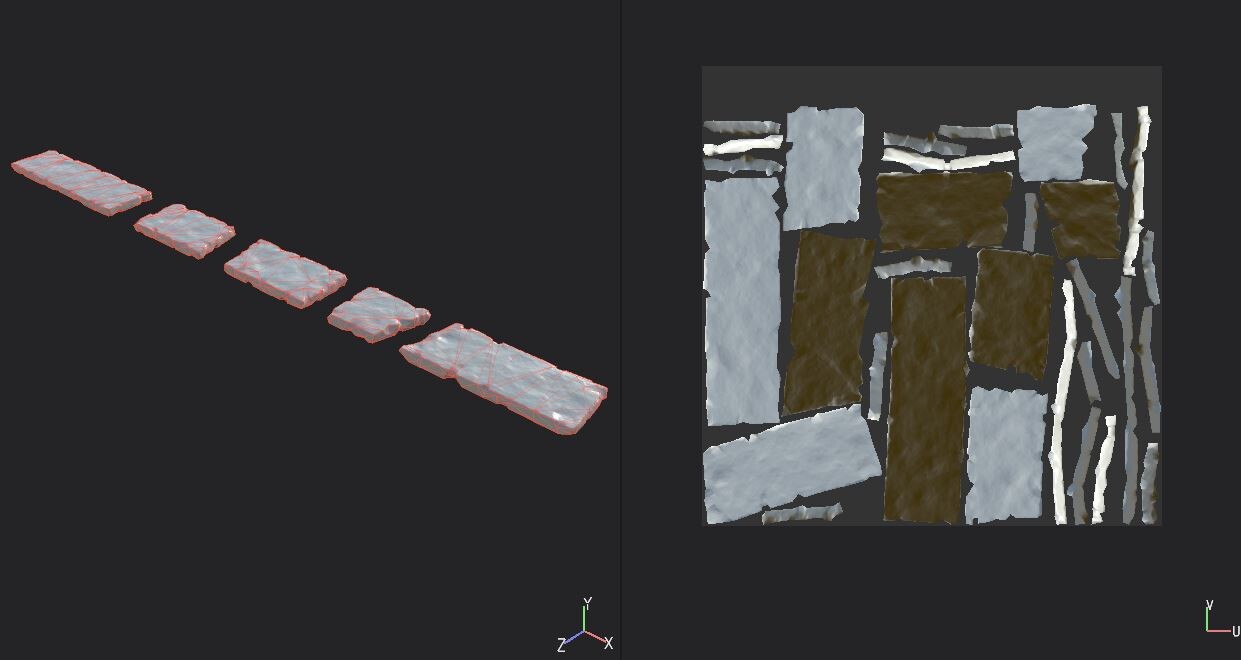
I developed a stone path that will be used modularly throughout the scene. The design was taken from the base block-in, which I got a lot of mileage out of. The stones are designed to be flipped upside down, mirrored, and rotated, so I tried to give them an even amount of wear on both sides. 

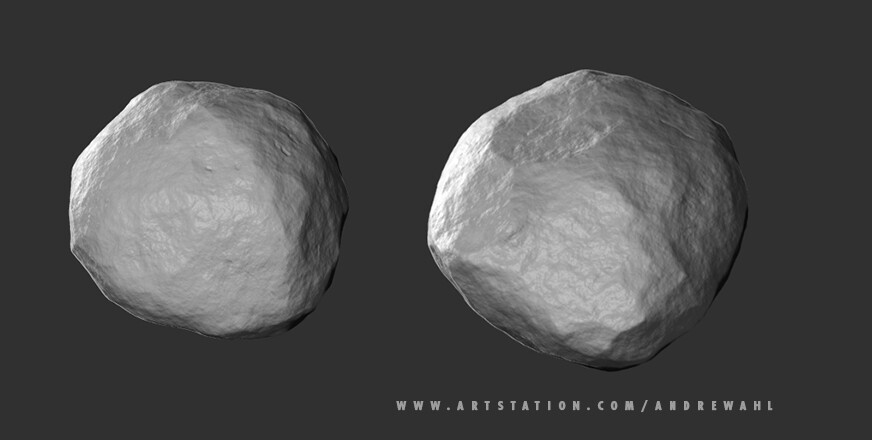
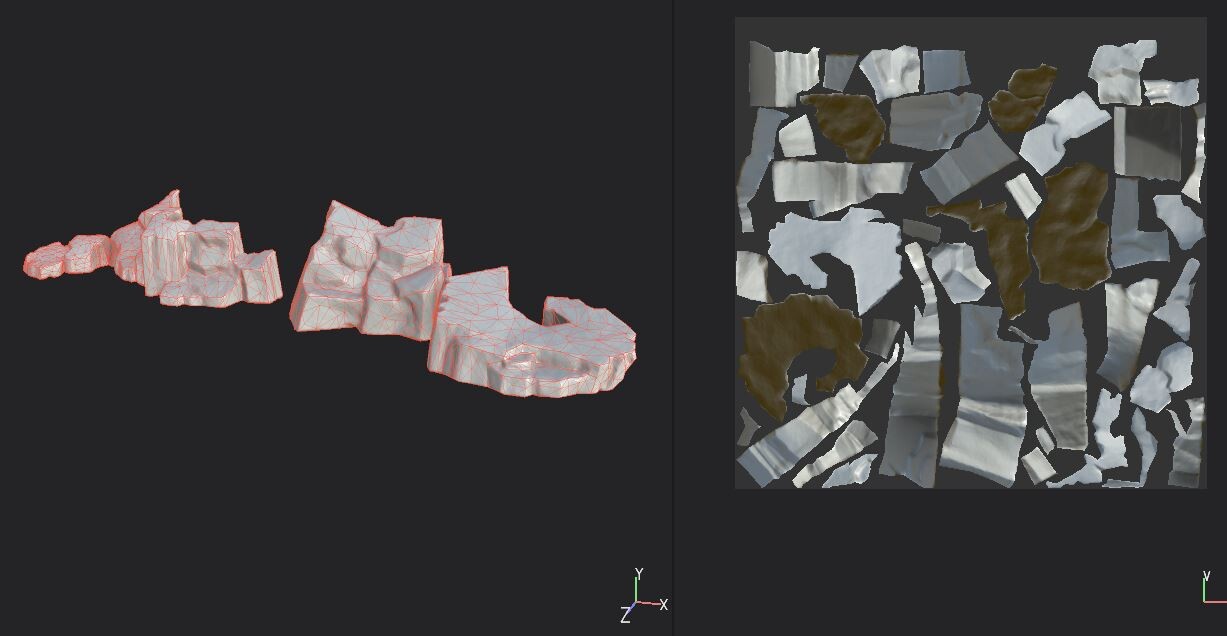
The final assets I developed in this series was a square boulder and a rounded boulder for set dressing and contrast. I wanted to make a distinction between the worked stones that had been carved by man and the natural stones, likely from a the quarry they were taken from, or perhaps even debris from the shaping process of the stones. 


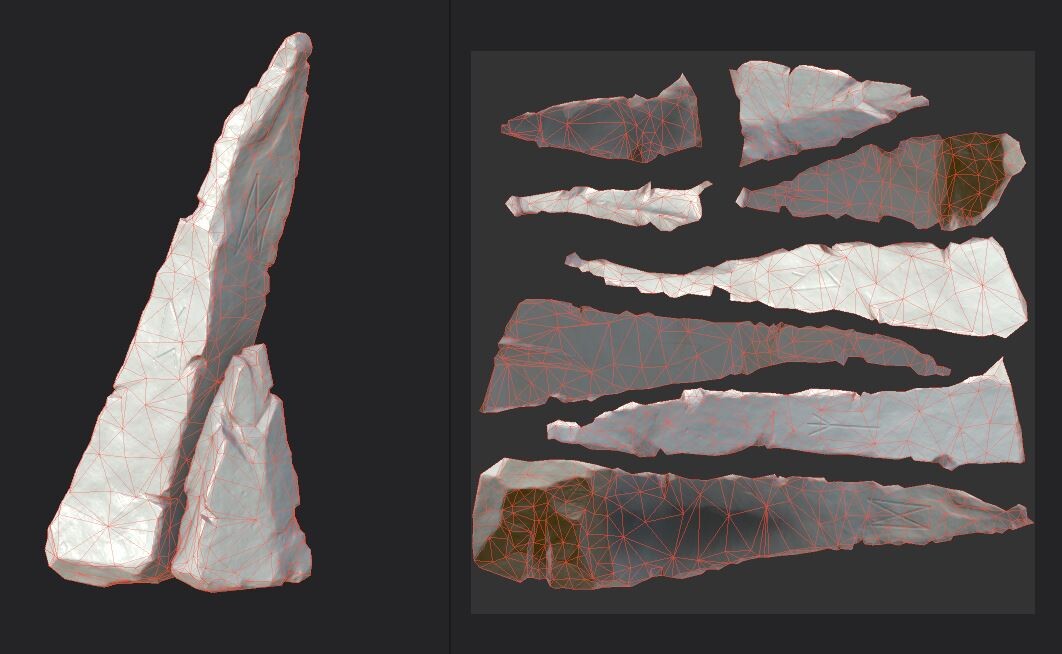
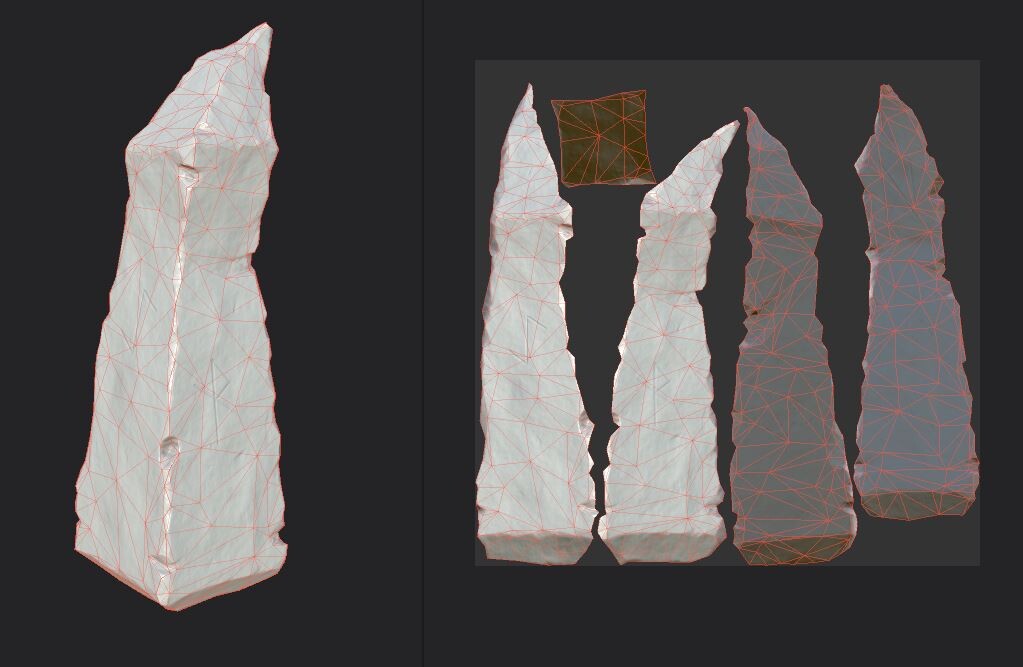
The next step in my process is the game mesh and UV unwrapping. For the base meshes I manually retopologized the main stone, but on the others I cleaned up a decimation from ZBrush.


After the UV layout, my next step is creating a smart material to use across the stones since they will all be quarried and exist in the same location for the same period. This is my initial pass at developing the texture for the Hero asset. The next stage is applying it across the stones and customizing the textures for each stone.